Books, Courses & Certifications
6 Prompt Engineering Courses: Free Training for Beginners

Artificial intelligence is a highly competitive field, and breaking into it requires a strategic approach. Beginners can seek out and earn certifications to learn the relevant skills needed to excel in the industry and demonstrate their understanding of core AI areas. Mastering how to craft and use prompts effectively is one of the first steps you can take to start exploring various AI tools and models, and the easiest way to get experience in prompt engineering is by enrolling in short, free online courses intended for beginners.
I evaluated a number of courses to see how they compared. Here are my picks for the six top free prompt engineering certifications for beginners:
Free Prompt Engineering Course Comparison
The chart below summarizes the certifying body, duration, use cases, and support solutions for the top six free prompt engineering courses for beginners. To choose which suits your interests and professional goals, continue reading for more detailed information.
Top 6 Free Prompt Engineering Courses for Beginners
Prompt engineering is the art of crafting effective prompts to guide AI models, and mastering this field is a valuable skill. While many paid courses are available, a free prompt engineering course offers an excellent starting point for beginners. It provides a solid foundation in the fundamentals of prompt engineering, allowing you to experiment with the capabilities of AI models without any financial commitment.
Understanding Prompt Engineering
Best for Learning Prompting with ChatGPT
Who It’s For: Beginners looking for a quick introductory course on prompt engineering using ChatGPT covering basic concepts and hands-on practice.
This beginner-friendly course, offered by DataCamp, covers the essentials of prompt engineering and the skills needed to master using ChatGPT. The course starts by unpacking the fundamental concepts of prompt engineering, teaching you to construct clear, specific, and open-ended prompts. It will also help you explore basic techniques and more advanced strategies like zero-shot, one-shot, and few-shot prompting using ChatGPT. Additionally, this course will equip you with skills to assess the quality of ChatGT’s responses, ensuring that you know how to check the accuracy and relevance of its answers.

Why I Picked It
I chose this course for its accessibility and structured curriculum designed for beginners who want to explore prompt engineering with ChatGPT. It covers both fundamental prompt engineering concepts and specialized training techniques that apply to ChatGPT. The short course also offers a hands-on experience in writing your very first prompt in a fun and interactive way. However, only the first chapter of the course is completely free. You need to upgrade to DataCamp’s paid version. It costs $13 per month, billed annually, to access the full course.
Skills Acquired
- Basic knowledge of prompt engineering
- Prompt strategies and techniques
- Advanced prompt engineering
Key Course Details
The following is a high-level overview of what you need to know about course requirements, fees, duration, format, and content:
Course Requirements
Course Fee, Duration, and Format
- Free (Chapter One)
- Starts at $13 per month, billed annually for full access
- One hour to complete
- Self-paced online learning via DataCamp
Course Content and Assessments
- Introduction to prompt engineering concepts and techniques
- Practical demonstration with ChatGPT
- Quick prompting exercises
The remaining two chapters are only accessible to paid users. These chapters include exercises and tests on advanced prompt engineering and prompting techniques. The course “Understanding Prompt Engineering” is part of the ChatGPT Fundamentals skill track. It helps learners master prompt crafting to maximize the AI chatbot’s capabilities.
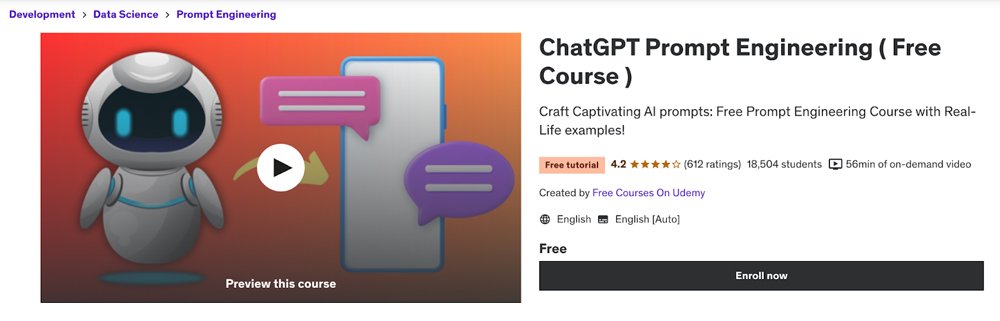
ChatGPT Prompt Engineering
Best for Understanding Prompt Engineering Concepts
Who It’s For: Anyone who wants to learn basic prompt engineering concepts and practical examples.
The ChatGPT Prompt Engineering course, hosted on Udemy, is an excellent introductory lesson to prompt engineering concepts. It offers beginners a foundational knowledge of prompt engineering, artificial intelligence, large language models (LLMs), generative text models, and natural language processing (NLP). Unlike other basic ChatGPT lessons, this course also discusses how to use prompt engineering with Python and apply it to various use cases. Additionally, this course covers different practical examples of how prompt engineering is used in real-world cases.
Why I Picked It
The ChatGPT Prompt Engineering course offers digestible information on basic prompt engineering concepts and real-world examples. It’s also easily accessible, as you can simply sign up and view an hour of on-demand videos without any financial commitment. While it doesn’t offer hands-on exercises like other courses, learners can study and progress at their own pace through short videos. You can pause, rewind, or fast-forward as needed, making it easier for you to adjust to your learning style and schedule.
Skills Acquired
- Prompt engineering definition
- Different types of prompts
- Prompt engineering terms (AI, NLP, GPT, and LLM)
- Prompt engineering practical examples
Key Course Details
The following is a high-level overview of what you need to know about course requirements, fees, duration, format, and content:
Course Requirements
Course Fee, Duration, and Format
- Free
- One hour to complete
- Self-paced online learning via Udemy
Course Content and Assessments
- Introduction to ChatGPT prompt engineering
- Prompt engineering terms and concepts
- Practical examples
Essentials of Prompt Engineering
Best for Mastering Prompt Engineering Techniques
Who It’s For: Beginners who want to learn more about different prompting techniques.
The Essentials of Prompt Engineering course offered by Amazon Web Services (AWS) via Coursera delves into the fundamentals of crafting effective prompts. In this course, beginners will learn how to craft, refine, and use prompts for different real-world use cases. You will explore various techniques like zero-shot, few-shot, and chain-of-thought prompting and learn how to fine-tune prompts for optimal results. Aside from basic prompting techniques, you will also understand how to identify possible risks associated with prompt engineering through readings and a self-reflective quiz.

Why I Picked It
The AWS Essentials of Prompt Engineering is a great starter course for anyone who wants to learn about different prompting techniques. The course is easy to follow and provides clear examples of various prompting techniques, allowing beginners to choose which one to master later. While this course doesn’t offer a shareable certification, you still have the advantage of learning from experts in the industry. This short course is offered by Amazon Web Services (AWS), a leading provider of AI and cloud computing solutions, giving you access to real-world industry knowledge.
Skills Acquired
- Learn about various prompt engineering technologies
- Understand how to modify prompts effectively
- Learn different prompting strategies
- Identify prompt misuses and risks
Key Course Details
The following is a high-level overview of what you need to know about course requirements, fees, duration, format, and content:
Course Requirements
Course Fee, Duration, and Format
- Free
- One hour to complete
- Self-paced online learning via Coursera
Course Content and Assessments
- Prompt basics
- Prompt misuses and risks
Learners must pass the knowledge check to finish this short module on prompt engineering essentials.
ChatGPT for Everyone
Best for Using ChatGPT to Maximize Productivity
Who It’s For: Beginners who want to learn how to use ChatGPT to improve their productivity with different tasks.
Learn Prompting’s ChatGPT for Everyone is a user-friendly course created in collaboration with OpenAI. The course breaks down on how you can learn about ChatGPT, how to use it, and writing your first basic prompt. It will also tackle how to use and set up ChatGPT to help you improve your productivity for various purposes. You can watch the on-demand videos that are easy to follow taught by instructors Sander Schulhoff, the founder and chief executive officer of Learn Prompting and Shyamal Anadkat, a member of the Applied AI team at OpenAI.

Why I Picked It
The ChatGPT for Everyone course stands out for its focus on practical applications and maximizing ChatGPT’s capability to increase productivity in different use cases. Unlike some technical AI certifications, this course prioritizes simple explanations and practical examples of real-world ChatGPT usage. Instructors discussed how to use ChatGPT for learning, preparing for a mock interview, working as tech support, as a personal tutor, software development, and more. You will also learn about ChatGPT’s limitations, biases, and data privacy concerns to allow you to fully evaluate the generative AI tool before deciding to use it.
Skills Acquired
- Understand the practical applications of prompt engineering
- Familiarize ChatGPT, GPT 3.5, GPT 4, and DALL·E 3
- Learn how to use ChatGPT to maximize productivity
Key Course Details
The following is a high-level overview of what you need to know about course requirements, fees, duration, format, and content:
Course Requirements
Course Fee, Duration, and Format
- Free
- One hour to complete
- Self-paced online learning via Learn Prompting
Course Content and Assessments
- Setting up ChatGPT
- ChatGPT’s use cases
- Basics of prompt engineering
- Advanced ChatGPT interface and features
- Limitations and bias
- Data privacy
Prompt Engineering with Llama 2 &3
Best for Learning Prompting with Llama 2 and 3
Who It’s For: Anyone who wants to learn prompt engineering and Meta Llama 2 and Llama 3 models.
Prompt Engineering with Llama 2&3 is a project-based course offered by DeepLearning.AI and Coursera. It will help you learn how to craft prompts using Meta’s Llama 2 and 3 models to build applications and help you complete day-to-day tasks. Through the course’s hands-on approach, you’ll be able to experiment with prompt engineering techniques, learn how to use Code Llama to write and improve codes, and understand how to use LLMs responsibly. This short course is facilitated by Amit Sangani, the Senior Director of Partner Engineering at DeepLearning.AI.

Why I Picked It
I chose Prompt Engineering Llama 2&3 because it’s an excellent starter for anyone interested in learning prompt engineering and who wants to test Meta’s Llama models. You can learn various techniques for working effectively with Meta’s Llama models through a hands-on project you can add to your portfolio. The course is also accessible on the cloud, so you can use essential tools and resources without downloading or installing anything. Additionally, this course will introduce you to a thriving community of open-source developers building applications powered by Llama 2 and 3, which can be a first step into networking with other professionals in the AI industry.
Skills Acquired
- Best practices to prompting Llama 2 and 3 models
- How to build safe and responsible AI applications using the Llama Guard model
- How to effectively interact with Meta Llama 2 Chat, Code Llama, and Llama Guard models
Key Course Details
The following is a high-level overview of what you need to know about course requirements, fees, duration, format, and content:
Course Requirements
Course Fee, Duration, and Format
- Free
- One hour to complete
- Self-paced online learning via Coursera
Course Content and Assessments
- Best practices for prompting with Llama 2 and 3 models
- Using advanced prompting techniques with LLama 2
- Applying Code Llama to write and improve codes
- Promoting safe and responsible use of LLMs using Llama Guard check
Introduction to Prompt Engineering
Best for Understanding Prompt Engineering for Application Development
Who It’s For: Developers who want to learn how to use ChatGPT to create applications.
DataCamp’s Introduction to Prompt Engineering provides a solid foundation for learners who want to master prompt crafting for developing applications. The free chapter discusses prompt engineering principles, different types of prompts, and how to create structured outputs and conditional prompts. The paid chapters will discuss advanced prompt engineering strategies, prompt engineering’s real-world business applications, and developing chatbots using prompts. While learners need to upgrade to a paid subscription to access, the free chapter is a good starting point to learn more about using prompting for app development through comprehensive videos you can watch at your own pace.

Why I Picked It
Developers who seek to apply ChatGPT to their projects will find this course an ideal starting point to explore prompt engineering. While this is not a complete beginner’s course, it offers a comprehensive introduction to developers new to ChatGPT and how they can use it for different use cases. It also has a simple pre-requisite, a beginner course on working with the OpenAI API. However, you have to upgrade to a paid plan starting at $13 per month, billed annually for full access to the course. Fortunately, you can access more free chapters on DataCamp to explore other courses on AI, LLMs, and software development at no cost.
Skills Acquired
- Crafting effective prompts for building applications
- Advanced techniques for prompt engineering
- Using prompt engineering for business use cases
- Chatbot development
Key Course Details
The following is a high-level overview of what you need to know about course requirements, fees, duration, format, and content:
Course Requirements
Course Fee, Duration, and Format
- Free (Chapter One)
- Additional chapters start at $13 per month, billed annually
- Four hours to complete
- Self-paced online learning via DataCamp
Course Content and Assessments
- Introduction to prompt engineering
- Structured outputs and conditional prompts
Frequently Asked Questions (FAQs)
A prompt engineering certificate can be valuable, especially if you want to pursue a career in artificial intelligence. You can validate your skills to potential employers or clients and also gain the essential skills and knowledge you need to excel in the AI industry. However, the value of a certificate depends on the certifying body or institution that issued it and the specific skills it validates.
It’s essential to plan which prompt engineering courses or generative AI programs you should invest your time and resources in. Free courses for beginners are a great place to start since you don’t have to commit financially right away and you can also study at your own pace.
While having a degree in computer science or a related field can be beneficial, it’s possible to become a prompt engineer without one. Many AI professionals with diverse backgrounds have successfully transitioned into prompt engineering roles as long as they have the necessary skills and experience. If you’re interested in building a career in prompt engineering, gaining relevant AI certifications is well worth the time and money involved.
It’s also essential to explore other AI topics to expand your knowledge and skills, such as generative AI, machine learning, deep learning, and more. Another way to widen your perspective in prompt engineering and relevant fields is to attend top AI conferences to meet other AI professionals who can be a part of your network.
Prompt engineering isn’t exclusively dependent on coding skills, but you should at least have foundational knowledge. Even if you’re not coding directly, prompt engineers have to work with other AI professionals and help guide an automation team.
While the primary focus of a prompt engineer is understanding natural language processing (NLP) and crafting effective prompts, knowing how to code in Python helps you learn NLP and deep learning models more easily. Additionally, mastering Python and other programming languages, if possible, gives you an advantage in a competitive AI field.
Bottom Line: Best Generative AI Certifications
Prompt engineering and generative AI is a rapidly growing field, and gaining a certification will give you an advantage in this competitive industry. There are many free certifications available to kickstart your prompt engineering career. The best option should align with your professional objectives and learning style. My recommendations include the top prompt engineering courses that beginners can take without financial commitment. Before deciding on the prompt engineering program you want, consider your long-term goals, the specific LLM you’re interested in, and the resources you’re willing to invest in.
Learn more about visionaries shaping the field of artificial intelligence and generative AI by reading our list of the top AI companies and leading generative AI companies.


Books, Courses & Certifications
Powering innovation at scale: How AWS is tackling AI infrastructure challenges

As generative AI continues to transform how enterprises operate—and develop net new innovations—the infrastructure demands for training and deploying AI models have grown exponentially. Traditional infrastructure approaches are struggling to keep pace with today’s computational requirements, network demands, and resilience needs of modern AI workloads.
At AWS, we’re also seeing a transformation across the technology landscape as organizations move from experimental AI projects to production deployments at scale. This shift demands infrastructure that can deliver unprecedented performance while maintaining security, reliability, and cost-effectiveness. That’s why we’ve made significant investments in networking innovations, specialized compute resources, and resilient infrastructure that’s designed specifically for AI workloads.
Accelerating model experimentation and training with SageMaker AI
The gateway to our AI infrastructure strategy is Amazon SageMaker AI, which provides purpose-built tools and workflows to streamline experimentation and accelerate the end-to-end model development lifecycle. One of our key innovations in this area is Amazon SageMaker HyperPod, which removes the undifferentiated heavy lifting involved in building and optimizing AI infrastructure.
At its core, SageMaker HyperPod represents a paradigm shift by moving beyond the traditional emphasis on raw computational power toward intelligent and adaptive resource management. It comes with advanced resiliency capabilities so that clusters can automatically recover from model training failures across the full stack, while automatically splitting training workloads across thousands of accelerators for parallel processing.
The impact of infrastructure reliability on training efficiency is significant. On a 16,000-chip cluster, for instance, every 0.1% decrease in daily node failure rate improves cluster productivity by 4.2% —translating to potential savings of up to $200,000 per day for a 16,000 H100 GPU cluster. To address this challenge, we recently introduced Managed Tiered Checkpointing in HyperPod, leveraging CPU memory for high-performance checkpoint storage with automatic data replication. This innovation helps deliver faster recovery times and is a cost-effective solution compared to traditional disk-based approaches.
For those working with today’s most popular models, HyperPod also offers over 30 curated model training recipes, including support for OpenAI GPT-OSS, DeepSeek R1, Llama, Mistral, and Mixtral. These recipes automate key steps like loading training datasets, applying distributed training techniques, and configuring systems for checkpointing and recovery from infrastructure failures. And with support for popular tools like Jupyter, vLLM, LangChain, and MLflow, you can manage containerized apps and scale clusters dynamically as you scale your foundation model training and inference workloads.
Overcoming the bottleneck: Network performance
As organizations scale their AI initiatives from proof of concept to production, network performance often becomes the critical bottleneck that can make or break success. This is particularly true when training large language models, where even minor network delays can add days or weeks to training time and significantly increase costs. In 2024, the scale of our networking investments was unprecedented; we installed over 3 million network links to support our latest AI network fabric, or 10p10u infrastructure. Supporting more than 20,000 GPUs while delivering 10s of petabits of bandwidth with under 10 microseconds of latency between servers, this infrastructure enables organizations to train massive models that were previously impractical or impossibly expensive. To put this in perspective: what used to take weeks can now be accomplished in days, allowing companies to iterate faster and bring AI innovations to customers sooner.
At the heart of this network architecture is our revolutionary Scalable Intent Driven Routing (SIDR) protocol and Elastic Fabric Adapter (EFA). SIDR acts as an intelligent traffic control system that can instantly reroute data when it detects network congestion or failures, responding in under one second—ten times faster than traditional distributed networking approaches.
Accelerated computing for AI
The computational demands of modern AI workloads are pushing traditional infrastructure to its limits. Whether you’re fine-tuning a foundation model for your specific use case or training a model from scratch, having the right compute infrastructure isn’t just about raw power—it’s about having the flexibility to choose the most cost-effective and efficient solution for your specific needs.
AWS offers the industry’s broadest selection of accelerated computing options, anchored by both our long-standing partnership with NVIDIA and our custom-built AWS Trainium chips. This year’s launch of P6 instances featuring NVIDIA Blackwell chips demonstrates our continued commitment to bringing the latest GPU technology to our customers. The P6-B200 instances provide 8 NVIDIA Blackwell GPUs with 1.4 TB of high bandwidth GPU memory and up to 3.2 Tbps of EFAv4 networking. In preliminary testing, customers like JetBrains have already seen greater than 85% faster training times on P6-B200 over H200-based P5en instances across their ML pipelines.
To make AI more affordable and accessible, we also developed AWS Trainium, our custom AI chip designed specifically for ML workloads. Using a unique systolic array architecture, Trainium creates efficient computing pipelines that reduce memory bandwidth demands. To simplify access to this infrastructure, EC2 Capacity Blocks for ML also enable you to reserve accelerated compute instances within EC2 UltraClusters for up to six months, giving customers predictable access to the accelerated compute they need.
Preparing for tomorrow’s innovations, today
As AI continues to transform every aspect of our lives, one thing is clear: AI is only as good as the foundation upon which it is built. At AWS, we’re committed to being that foundation, delivering the security, resilience, and continuous innovation needed for the next generation of AI breakthroughs. From our revolutionary 10p10u network fabric to custom Trainium chips, from P6e-GB200 UltraServers to SageMaker HyperPod’s advanced resilience capabilities, we’re enabling organizations of all sizes to push the boundaries of what’s possible with AI. We’re excited to see what our customers will build next on AWS.
About the author
Barry Cooks is a global enterprise technology veteran with 25 years of experience leading teams in cloud computing, hardware design, application microservices, artificial intelligence, and more. As VP of Technology at Amazon, he is responsible for compute abstractions (containers, serverless, VMware, micro-VMs), quantum experimentation, high performance computing, and AI training. He oversees key AWS services including AWS Lambda, Amazon Elastic Container Service, Amazon Elastic Kubernetes Service, and Amazon SageMaker. Barry also leads responsible AI initiatives across AWS, promoting the safe and ethical development of AI as a force for good. Prior to joining Amazon in 2022, Barry served as CTO at DigitalOcean, where he guided the organization through its successful IPO. His career also includes leadership roles at VMware and Sun Microsystems. Barry holds a BS in Computer Science from Purdue University and an MS in Computer Science from the University of Oregon.
Books, Courses & Certifications
Introducing Coursera Skill Tracks: A tailored, data-backed learning solution to help functional teams develop critical and verified skills

By Patrick Supanc, Chief Product Officer
Today at Coursera Connect, our annual conference, we announced the launch of Skill Tracks, our data-backed learning solution mapped to specific occupations that guides learners from foundational knowledge to expert proficiency through verified skill paths.
Skill Tracks are powered by Coursera’s Career Graph, our proprietary system that analyzes millions of labor market data points, third-party competency frameworks, and our skills taxonomy, to precisely map the relationships between jobs, skills, and learning content, ensuring organizations can close skill gaps quickly.
View a Skill Tracks video here.
The World Economic Forum’s Future of Jobs Report 2025 finds that 63% of employers see skill gaps as the biggest barrier to business transformation, with nearly 6 in 10 workers needing reskilling within the next five years. With Coursera Skill Tracks, leaders can ensure their teams have the right skills to boost innovation, productivity, and retention.
Key features include:
- A tailored learning experience – In addition to world-class content from industry leaders and universities like Microsoft, AWS, Yale, and Stanford, learning leaders can customize Skill Tracks with their own content, ensuring alignment with their organization’s specific tools, workflows, and business priorities.
- Rigorous and verifiable credentials – Learners progress toward credentials based on real-world assessments, providing both motivation and proof that skills are not only learned but also demonstrated.
- Real-time insights and alignment to business goals – Regular tracking of learning progress and continuous content updates ensure Skill Tracks stay current with market demands, align with changing skill requirements for roles, and directly connect skill acquisition with business performance and growth.
Starting today, four Skill Tracks are available:
- Software and Product – Covers the most critical skills in mobile development, product management, UX design, web development, and software development
- IT – Includes necessary skills in computer systems and architecture, cybersecurity, IT management, IT support and operations, and network engineering
- Data – Develops critical skills in data analysis, data engineering, data management, and AI and machine learning
- GenAI – Teaches practical applications of artificial intelligence for employees and leaders across customer service, human resources, data, finance, legal, marketing, product, sales, and more

Over the coming months, we’ll introduce additional Skill Tracks and enhanced features, including skill diagnostics to help learners start at the right level and verified skill paths with performance-based skills evaluation to produce credentials that reflect practical, job-ready expertise.
According to Matthew Dearmon, Ph.D, Informatica’s Senior Director, Talent Management and Leadership Development, “At Informatica, we have the only data management platform powered end-to-end by artificial intelligence, so it is vital that our teams and leaders are not just up-to-date, but are also looking ahead. Having a tailored learning solution aligned with real-time skills in demand for specific roles is essential to helping our technical leaders thrive when working with AI – and beyond.”
Paola Vera, Talent Management Head at Interbank added, “Coursera’s personalized learning approach has been a catalyst in helping Interbank build a data-driven, future-ready organization. Having targeted learning journeys informed by real-time labor data and aligned to specific occupations and career stages, can help ensure teams master the right skills for their role.”
Skill Tracks are available to existing Coursera customers with access to the full catalog. New customers can purchase Skill Tracks individually or bundled with the full catalog.
Learn more about Coursera Skill Tracks and discover how a tailored, data-driven learning approach can accelerate skills development, technology adoption, or workforce transformation.
Click here to watch CEO Greg Hart’s keynote at Coursera Connect 2025, with a Skill Tracks demo and more.
Books, Courses & Certifications
Expanding Career Pathways with New Partners and Professional Certificates

By Marni Baker Stein, Chief Content Officer, Coursera
Today at Coursera Connect, our annual conference, we announced a major expansion of our partner network with several new world-class universities and forward-thinking industry leaders. Each new partnership deepens our commitment to helping learners around the world master the skills they need to grow their careers.
In a world defined by rapid technological change, learners need flexible, affordable ways to keep pace. That’s why we’re expanding access to career-focused content across all levels of learning, from entry-level Professional Certificates to stackable courses that lead toward degrees.
Welcoming our new partners
We’re proud to welcome our newest partner, Anthropic, one of the world’s leading AI research companies. Together, we’ll help learners and institutions apply the latest advances in AI, safely, effectively, and ethically — unlocking new ways to learn, teach, and work.
In addition to Anthropic, we’re also excited to welcome several new university and industry partners, expanding our reach across industries and disciplines:
- Hult International Business School – Global business education with campuses worldwide
- Minnesota State University, Mankato – Comprehensive U.S. public university
- University of the Arts London – Europe’s largest specialist creative arts university
- College of Engineering: University of Miami – Top rated Educational and Research University
- Universitat Politècnica de València – Spain’s leading STEM and engineering university
- UC Santa Barbara – Top 10 U.S. public research university
Leading organizations joining Coursera as industry partners include:
- AAPC – U.S. leader in medical billing and coding
- Harvard Business Publishing – Publisher of Harvard Business Review content
- ISSA (International Sports Sciences Association) – Global leader in fitness and wellness certification
- Pearson – Global leader in learning and assessments
- Skillshare – A creative learning community for personal and professional growth
These new partnerships strengthen our ability to deliver accessible, job-relevant learning for the modern workforce — spanning industries from healthcare and cybersecurity to generative AI, creative technology, and public policy.
Expanding Career Pathways with Courses and Professional Certificates
Professional Certificates on Coursera are designed to prepare learners for in-demand jobs, and many require no prior experience and can be completed in under six months. So far this year over 2.5M learners have enrolled in entry-level certs globally.
We’re excited to add new certificates from Microsoft, AAPC, and EC Council — creating even more opportunities for learners to gain job-ready skills.
- AAPC Medical Biller — Prepare for a career in healthcare billing by learning to process medical claims, manage reimbursements, and pass the Certified Professional Biller (CPB) exam.
- EC-Council Information Security Analyst — Learn to defend networks, investigate threats, and build job-ready cybersecurity skills in under five months.
- Coursera Python, SQL, Tableau for Data Science — Build practical skills to analyze, visualize, and present data insights.
- Microsoft SQL Server — Learn to design, secure, and optimize databases with real-world projects for data careers.
- Microsoft R Programming for Everyone — Develop data analysis and visualization skills in R using Microsoft tools, GitHub Copilot, and Azure integration.
- Microsoft JavaScript Starter Kit — Master the fundamentals and frameworks to build interactive, portfolio-ready web applications.
Getting a head start on a degree with new AI and emerging tech courses from Illinois
The University of Illinois Urbana-Champaign, one of Coursera’s most innovative university partners, has launched four new open courses that explore emerging technologies shaping the future of work. These courses are stackable into Illinois’ for-credit iMBA and iMSA degree programs and offer learners a meaningful head start toward a flexible, affordable graduate degree.
Courses now available:
These new offerings build on UIUC’s reputation for delivering high-quality, future-focused education on Coursera and offer learners an on-ramp to graduate-level learning with real career impact.
Coursera’s partner network includes some of the world’s most respected universities, industry leaders, and global organizations, all working together to deliver credentials that combine academic excellence with practical skill-building. As new technologies accelerate changes and lifelong learning becomes essential, we’re proud to work with our partners to expand access and create new opportunities for learners globally.
Watch Coursera CEO, Greg Hart’s keynote at Coursera Connect 2025 for demos of these new capabilities here.
Learn more about Skill Tracks here.
Read about our Product Announcements here.
-

 Business2 weeks ago
The Guardian view on Trump and the Fed: independence is no substitute for accountability | Editorial
-
Tools & Platforms4 weeks ago
Building Trust in Military AI Starts with Opening the Black Box – War on the Rocks
-

 Ethics & Policy1 month ago
SDAIA Supports Saudi Arabia’s Leadership in Shaping Global AI Ethics, Policy, and Research – وكالة الأنباء السعودية
-

 Events & Conferences4 months ago
Journey to 1000 models: Scaling Instagram’s recommendation system
-

 Jobs & Careers2 months ago
Mumbai-based Perplexity Alternative Has 60k+ Users Without Funding
-

 Education2 months ago
Macron says UK and France have duty to tackle illegal migration ‘with humanity, solidarity and firmness’ – UK politics live | Politics
-

 Education2 months ago
VEX Robotics launches AI-powered classroom robotics system
-

 Podcasts & Talks2 months ago
Happy 4th of July! 🎆 Made with Veo 3 in Gemini
-

 Funding & Business2 months ago
Kayak and Expedia race to build AI travel agents that turn social posts into itineraries
-

 Podcasts & Talks2 months ago
OpenAI 🤝 @teamganassi